Maybe it’s just my own personal hang-up, but I find wall switch and outlet plates boring. Usually wall switch plates come in white or almond. And the worst part is they show dirt quite easily. Of course you can buy colored wall switch plates, but I also have issues with these as well. Most of the colored wall switch plates are made by Leviton or Lutron. But these can set you back $10 to $20 a plate depending on material and color. Not only that but the Big Box stores don’t carry them which means you have to order them online. Then you run the risk that the red you see on the monitor is not the red that you thought when it’s delivered. So I have two inexpensive solutions to dress any wall switch plate.
Metal Wall Switch Plates
If you have a modern/contemporary decor, I recommend metal finish like stainless steel. They will blend in nicely in a non-traditional style home and they hide the dirt marks. The other great thing about stainless steal plates are they are fairly inexpensive and you can often find them at the Big Box store or your local hardware store. And even if you order them online, you will not have to worry about monitor color variation. The prices range from $.50 to $8 for brushed nickel.
Clear Acrylic Wall Switch Plates
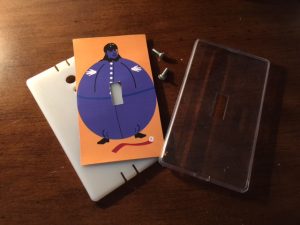
There is also another inexpensive and creative way to decorate your home using acrylic wall plates. For about $2 you can buy clear acrylic switch plate covers. Now these covers are normally used in conjunction with wall paper. The system is a 2-piece design that covers light switches along with the room’s wallpaper. A clear plate fronts the wallpaper and a back plate secures to the switch box. The wallpaper goes between the clear cover and back plate to create a seamless appearance. The wallpaper actually conceals the mounting screws.
That’s it. Now you have a custom wall switch plate instead of a boring white or almond plate.
DIY Custom Wall Switch Plate
Another great way to use these clear switch plates involves inserting a favorite family picture or art piece. Even create your own design and insert it in the clear plate. Here are the steps involved to create your own custom wall switch plate.
- Usually the wall switch plate comes with a paper insert. Note the divisions as your insert needs to be the same size.
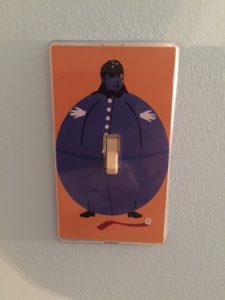
- Next, brain storm for ideas for your insert. Maybe it’s going to be a print-out of your favorite Picasso. Or if its for you child’s room, a favorite photo of them. Just remember to think about your composition. In the middle of the picture will be a rectangular hole for the switch. I created an illustration of Violet from Willy Wonka for my guest room.

- Now print out your design on a color printer. Print the picture a little larger than the insert. You can always trim it later. Now you are ready to start the installation.
Installation Steps
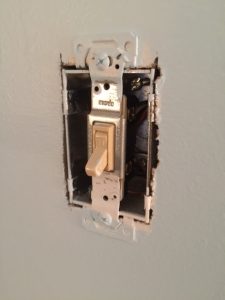
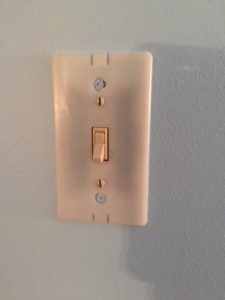
Step 1. Remove the screw of the existing wall switch plate cover. Generally this does not involve shutting the power off to the switch. But if it makes you feel safer, by all means, shut-off the power at the main box.

Step 2. Mount the back plate to the switch box with the provided screws.

Step 3. Insert your picture or artwork behind the acrylic cover.
Step 4. Line up the acrylic cover to the back plate and snap it on.

That’s it. Now you have a custom wall switch plate instead of a boring white or almond plate.


I found it interesting that you said that you can customize your wall plates with family pictures. My wife and I are looking to get some wall accessories for our home. I’m going to talk to my wife about buying some wall plates.
I’m glad this was helpful to you. If you decide to do it, I would love to see some pics!